
 in Under 5 Minutes")
Ever wanted to create a fun little app that calculates your age with just a few clicks? Let’s build one — together. If you’re learning Python and want to explore GUI (Graphical User Interface) development, Tkinter is your best friend. In this tutorial, we’ll walk through the step-by-step process of building a Python Age Calculator using Tkinter — perfect for beginners looking to get their hands dirty.
Let’s dive in!
🛠 What You’ll Learn
- How to create a GUI using Tkinter
- How to collect and validate user input
- How to calculate someone’s age using the
datetimemodule - How to display results dynamically
📦 Step 1: Import Required Libraries
Start by importing the libraries needed for the project:
from tkinter import *
from datetime import date
tkinterlets us build the GUI.datefrom thedatetimemodule helps us get today’s date and calculate age.
🪟 Step 2: Initialize the Main Window
We create the app window and configure its size and title.
root = Tk()
root.geometry('280x300')
root.resizable(0, 0)
root.title('Age Calculator')
statement = Label(root)
Breakdown:
Tk()initializes the window.geometry('280x300')sets the window size.resizable(0, 0)disables resizing.title()gives our app a name.
🧮 Step 3: Define the Age Calculation Function
This is the core logic that calculates the user’s age:
def ageCalc():
    global statement
    statement.destroy()  # remove old result
    today = date.today()

    birthDate = date(int(yearEntry.get()), int(monthEntry.get()), int(dayEntry.get()))
    age = today.year - birthDate.year

    if (today.month < birthDate.month) or (today.month == birthDate.month and today.day < birthDate.day):
        age -= 1

    statement = Label(text=f"{nameValue.get()}'s age is {age}.")
    statement.grid(row=6, column=1, pady=15)
Key Notes:
- It reads inputs from year, month, and day.
- Compares the birthday to today’s date.
- Adjusts the age if the birthday hasn’t occurred yet this year.
🔤 Step 4: Add Input Fields
We create labels and input boxes for the name, year, month, and day of birth.
# Name
l1 = Label(text="Name: ")
l1.grid(row=1, column=0)
nameValue = StringVar()
nameEntry = Entry(root, textvariable=nameValue)
nameEntry.grid(row=1, column=1, padx=10, pady=10)
Repeat the same for Year, Month, and Day:
# Year
l2 = Label(text="Year: ")
l2.grid(row=2, column=0)
yearValue = StringVar()
yearEntry = Entry(root, textvariable=yearValue)
yearEntry.grid(row=2, column=1, padx=10, pady=10)

# Month
l3 = Label(text="Month: ")
l3.grid(row=3, column=0)
monthValue = StringVar()
monthEntry = Entry(root, textvariable=monthValue)
monthEntry.grid(row=3, column=1, padx=10, pady=10)

# Day
l4 = Label(text="Day: ")
l4.grid(row=4, column=0)
dayValue = StringVar()
dayEntry = Entry(root, textvariable=dayValue)
dayEntry.grid(row=4, column=1, padx=10, pady=10)
🧷 Step 5: Create the Button
Now, we add a button that will trigger the age calculation:
button = Button(text="Calculate age", command=ageCalc)
button.grid(row=5, column=1)
Clicking this button runs the ageCalc() function.
🔁 Step 6: Run the App Loop
Finally, to keep the window open and responsive:
root.mainloop()
This line is essential for rendering and maintaining the GUI.
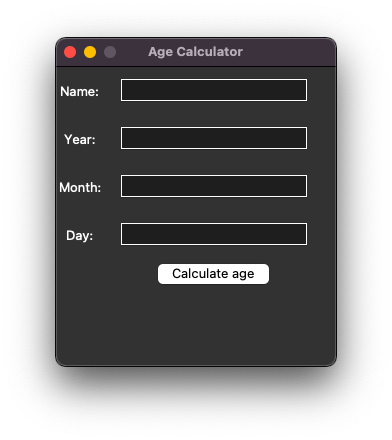
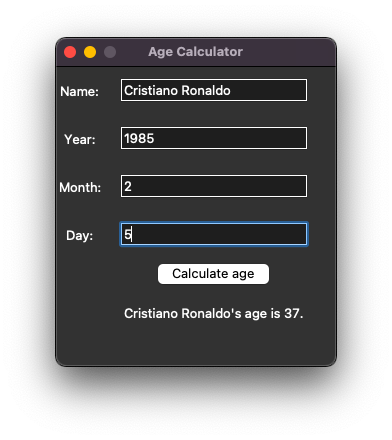
🖼 App UI Preview
age-calculator-python-gui-app-screenshot-01 age-calculator-python-gui-app-screenshot-02
✅ Final Thoughts
In just a few lines of code, you’ve built a fully functional GUI age calculator. Here’s what we practiced:
- Using
Tkinterfor UI - Extracting and processing user input
- Performing date calculations
- Displaying dynamic results
This is just the beginning — you could expand it with:
- Input validation (e.g., checking invalid dates)
- A calendar popup for DOB selection
- Styling the GUI for better aesthetics
🚀 Ready to Build More?
If this got you excited about what Python and Tkinter can do, imagine integrating AI into your next project.
Explore more fun projects, tutorials, and AI-powered solutions on Ossels AI Blog — your go-to hub for learning, creating, and innovating with AI.
🔍 FAQs
Q: Can this calculator work for leap years?
Yes, Python’s date object handles leap years accurately.
Q: What if I input an invalid date?
Currently, it may throw an error. You can add error handling using try-except blocks for a smoother experience.
Q: Can I convert this into a web app?
Absolutely! Consider using Flask or Django to bring it online.